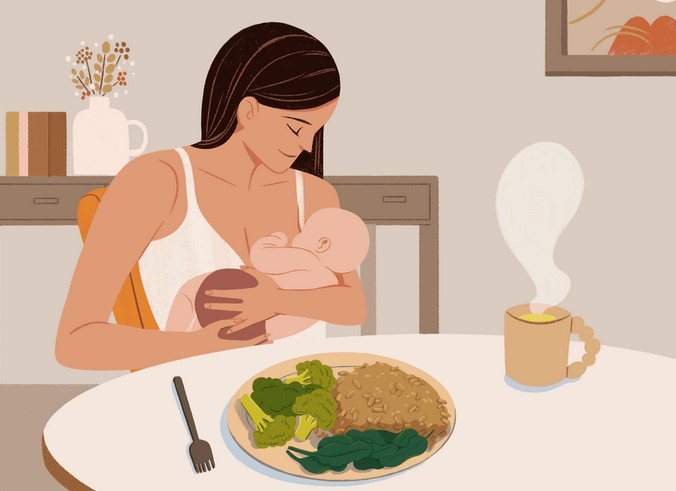
A young mother sits in a dimly lit room, holding her six-week-old baby. She is utterly exhausted, her body is still healing from an episiotomy, and she feels an overwhelming sense of isolation. On her phone, she scrolls through pristine social media feeds showing perfectly organized nurseries, but in her reality, she is struggling to get her baby to latch, wondering if her sudden mood drops are normal, and trying to decipher a confusing immunization schedule.
Over my ten years working on the frontlines of public health and family wellness coordination, I have stepped into countless rooms just like this one. The most vital insight I have learned in my career is that the health of a society is entirely dependent on how it treats its women and children during their most vulnerable biological window. We often celebrate the arrival of a newborn, but we frequently leave the mother stranded in a healthcare vacuum the moment she leaves the delivery ward.
This is exactly why Maternal and Child Health Programs exist. They are not merely bureaucratic safety nets or optional community resources; they are highly synchronized clinical frameworks designed to protect families during the most critical developmental stages of human life. Let’s peel back the medical complexity and explore how these programs operate, why they are essential for your family’s future, and how to navigate them effectively.
The 1,000 Days Window: Why Early Intervention Changes Everything
In public health, we focus obsessively on a concept known as the First 1,000 Days. This window spans from the moment of conception until a child reaches their second birthday.
The Skyscraper Foundation Analogy
Think of a child’s lifelong health as a massive, 100-story skyscraper. If you want that building to withstand earthquakes, storms, and structural stress decades into the future, you do not focus your architectural budget on picking out the paint for the 50th floor. You invest everything into pouring a thick, flawless concrete foundation at the very beginning.
The First 1,000 Days is that foundation. During this brief period, the brain develops faster than at any other stage of life, the gut microbiome establishes its baseline, and the metabolic system sets its long-term programming.
Preventive Blueprinting
If a mother suffers from chronic stress, undiagnosed gestational diabetes, or malnutrition during pregnancy, it alters the genetic expression of the developing fetus—a field of study known as epigenetics.
By intervening early through structured health programs, we can optimize prenatal nutrition, monitor fetal growth milestones, and prevent chronic health issues like cardiovascular disease and metabolic syndromes from taking root forty years later.
The Core Pillars of Maternal and Child Health Programs
Comprehensive community health initiatives are built upon three interconnected pillars that address both maternal recovery and pediatric development.
1. Continuum of Care (From Conception to Postpartum)
A successful program ensures there are no gaps in tracking health data as a woman transitions from pregnancy to motherhood.
-
Prenatal Surveillance: Routine screenings for preeclampsia (pregnancy-induced high blood pressure), gestational anemia, and fetal anomalies.
-
The Fourth Trimester Guard: Specialized postpartum care focused on monitoring uterine involution, pelvic floor rehabilitation, and maternal mental health.
2. Immunization and Preventive Pediatric Care
Childhood programs map out structured vaccination schedules to build herd immunity against preventable infectious pathogens like measles, mumps, rubella, and pertussis. They also track physical growth metrics like head circumference, length, and weight to catch developmental delays early.
3. Nutritional Fortification and Lactation Support
Programs provide direct counseling on infant feeding, ensuring mothers have access to lactation consultants to master breastfeeding mechanics, or providing balanced nutritional counseling to families navigating formula safety and weaning foods.
+------------------------+---------------------------------------+---------------------------------------+
| Program Intervention   | Clinical Focus Area                   | Long-Term Family Benefit              |
+------------------------+---------------------------------------+---------------------------------------+
| Prenatal Care &        | Regular screenings for biomarkers     | Prevents preterm birth, low birth     |
| Supplementation        | like iron, glucose, and blood pressure| weight, and maternal complications.   |
+------------------------+---------------------------------------+---------------------------------------+
| Postpartum Depression  | Universal screening scales (e.g.,     | Preserves maternal-infant bonding;     |
| Screenings             | Edinburgh Postpartum Depression Scale)| protects early childhood development.  |
+------------------------+---------------------------------------+---------------------------------------+
| Well-Child Milestone   | Tracking neurodevelopmental steps,    | Identifies speech, motor, or sensory  |
| Tracking               | motor skills, and growth percentiles. | delays for early physical therapy.    |
+------------------------+---------------------------------------+---------------------------------------+
Deconstructing Postpartum Mental Health: The Silent Pillar
For too long, traditional healthcare systems treated childbirth as a purely orthopedic or obstetrical event. You deliver the baby, check the vitals, and send you home. But modern Maternal and Child Health Programs are drastically shifting focus toward maternal neurobiology.
The Brain Chemistry Shift
Following the delivery of the placenta, a mother experiences the most radical hormonal crash in human physiology. Progesterone and estrogen levels plummet by over 100-fold within 24 hours.
This biochemical drop, combined with severe sleep deprivation, can trigger the “baby blues” in up to 80% of mothers. However, when those symptoms stretch past two weeks and morph into persistent anxiety, deep sadness, or intrusive thoughts, it enters the realm of Postpartum Depression (PPD) or Postpartum Anxiety (PPA).
Integrated health programs normalize these struggles by incorporating universal mental health screenings during every routine pediatric checkup. They recognize that you cannot care for the child if you neglect the psychological ecosystem of the mother.
Expert Advice and Hidden Warnings
Navigating family healthcare programs requires understanding how to advocate for yourself within the system.
💡 Pro Tip: Build Your Personal Care Ledger: Do not rely on different hospital portals or scattered paper charts to track your family’s medical history. Create a dedicated digital folder or a physical binder containing your prenatal blood work, birth summaries, and your child’s immunization logs. When moving between primary care physicians, pediatricians, or public clinics, having your own scannable record ensures no critical milestone or booster shot slips through the bureaucratic cracks.
⚠️ Watch Out for the Postpartum Erasure Syndrome: There is a dangerous, unspoken bias in modern healthcare where a mother is intensely monitored while pregnant, but completely ignored once the baby is born. The classic medical model provides a six-week checkup for the mother, but schedules multiple appointments for the baby during that same timeframe. If you feel extreme fatigue, persistent localized pain, shortness of breath, or deep emotional distress before your six-week appointment, do not wait. Step forward and demand a postpartum evaluation early; your health matters just as much as your newborn’s.
Your Practical Action Plan to Leverage Community Health Programs
Ready to maximize the health resources available to your growing family? Use this step-by-step framework to build your clinical support network:
-
Step 1: Map Your Local Public Health Assets: Research the maternal care programs, community clinics, and home-visiting nurse initiatives available in your zip code. Many of these resources are fully covered by health systems or local grants.
-
Step 2: Establish a Pediatric Medical Home: Secure a consistent pediatrician or family doctor before your third trimester. Having a single team tracking your child’s growth percentiles provides much higher data accuracy than utilizing fragmented urgent care clinics.
-
Step 3: Screen for Environmental and Nutritional Support: If you face financial stress, reach out to programs like WIC (Women, Infants, and Children) or local family support networks. These programs offer structural access to nutrient-dense foods, iron-fortified formulas, and early childhood education tools.
-
Step 4: Schedule Postpartum Mental Check-Ins: Pre-arrange a support circle with your partner, family, or an online maternal support group. Give them permission to look out for behavioral warning signs of PPD/PPA so you can get help quickly.
Protecting the Future of the Family Unit
Motherhood and early childhood are beautiful, transformative chapters, but they are also periods of immense physical, emotional, and systemic stress. You are not meant to navigate this monumental transition in absolute isolation.
By actively engaging with Maternal and Child Health Programs, you are stepping into a protective circle of clinical expertise, nutritional guidance, and mental health support. Embracing these resources isn’t a sign of weakness; it is the smartest, most proactive choice you can make to ensure your family’s foundation remains unshakable for generations to come.
Did you have access to a structured maternal or child health program during your family’s early stages? What was the single most helpful piece of advice or support you received from a healthcare worker during postpartum recovery? Let me know your personal stories and questions in the comments below—let’s build a stronger, more informed community of parents together!
 You sit down at your desk with a fresh cup of coffee, ready to conquer your to-do list. But instead of sharp focus, you are met with a thick, heavy mental fog. You read the same email three times without absorbing a single word. Your memory feels sluggish, your decision-making is shot, and you have a mild, persistent irritability that you can’t quite shake.